Deals – Add A New Standard, Itinerary, or Lead Deal
Important Note Regarding Deals Using Multicurrency
When a deal is initiated in a foreign currency (not the main currency of your environment), the system will return the prices added in the deal’s selected foreign currency if there are any. If no prices are added in the deal’s selected foreign currency, the prices added in the main currency will be returned. These are then exchanged to the deal’s currency according to a valid exchange rate between the buy currency and the deal’s selected foreign currency, applying the Custom Profit / Markup if any, or the price level Profit / Markup.
How to Add a Standard Deal
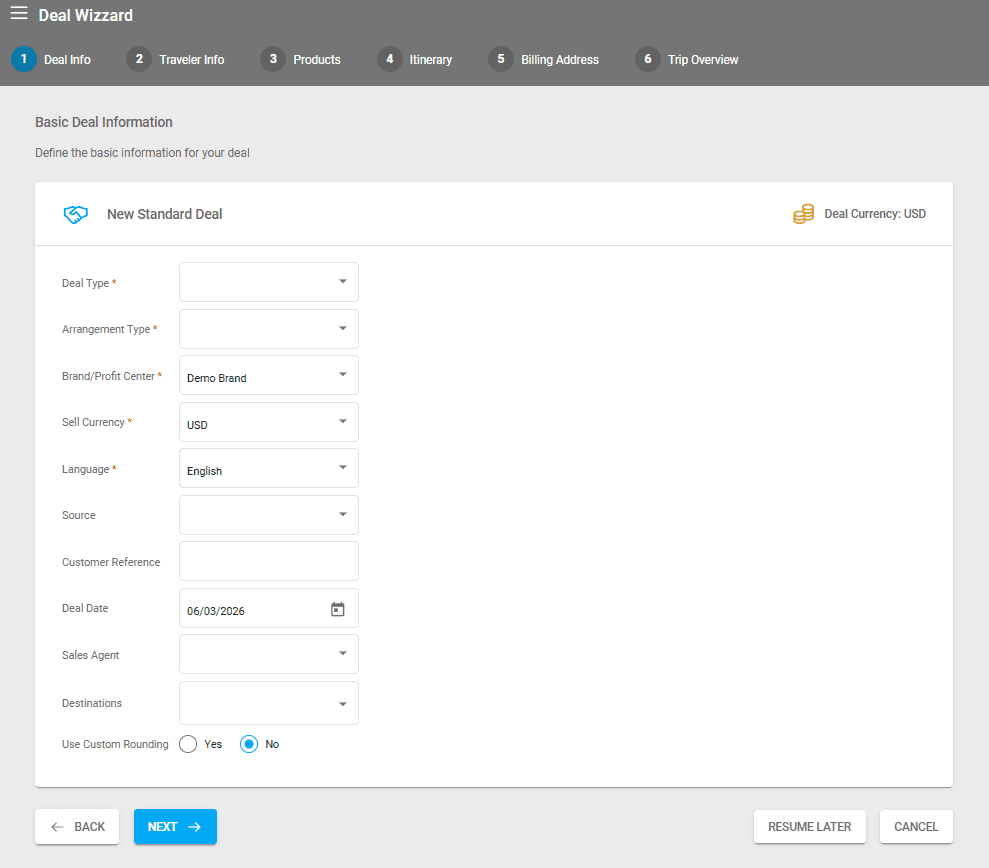
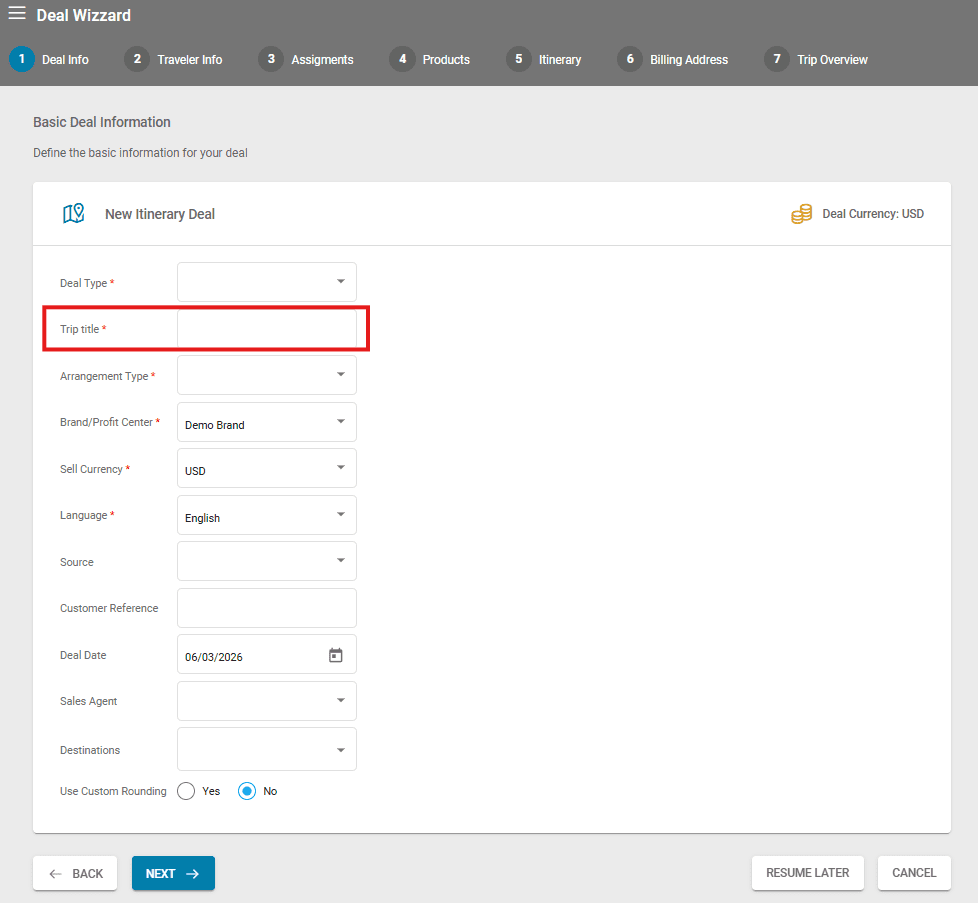
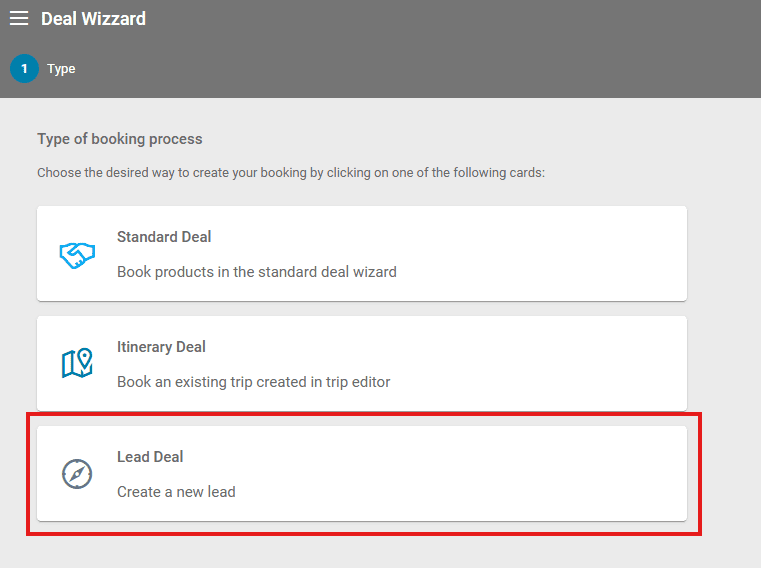
To add a new deal, navigate to Deals/Deals List in the left main menu and click on the + symbol. You will see three types of deals displayed:
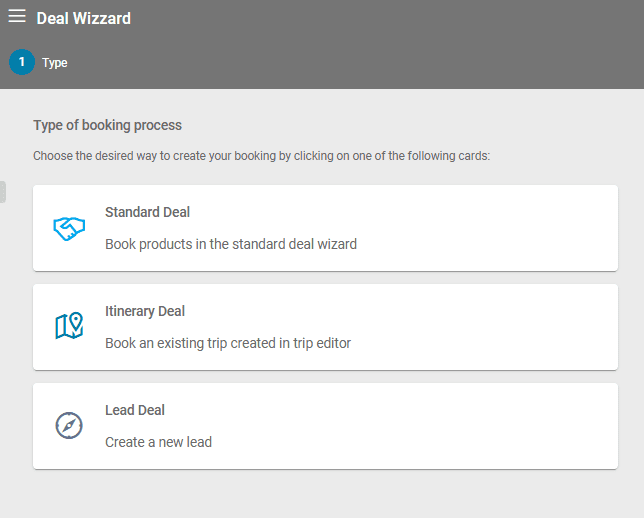
Select Standard Deal, and a new window will open where you can choose to create either an Option or a Deal, select the Arrangement Type, etc.
For other arrangement types, Brand/Profit Centers, or Destinations, you can add, edit, or remove them via Settings/Choice Lists
The brand you select when creating the deal will be assigned to the customer and to the deal’s arrangement.
Deals also have the possibility for custom rounding. This will be applied per deal regardless of the existing settings on the tenant level.
During the Booking Process at the first step, if the Brand/Profit Center is changed and it has a preferred language, the Deal’s language will also change to it.
Selecting Your Deal’s Currency
The booking wizard has a dedicated field for selecting your deal’s currency. The booking process also includes a reminder of the deal’s currency in the upper right corner. If you have selected the wrong currency on the first step, and you already have at least one arrangement added, the booking flow will not allow changing the sell currency, therefore in this case we recommend restarting the deal from scratch.
For a currency to show up in the sell drop-down, it has to be added as a Target currency with a valid exchange rate in the moment of the booking (current date between Season begin and Season end or without having Season begin and Season end specified and not being Archived).
When a deal is initiated in a foreign currency (not the main currency of your environment), the system will return the prices added in the deal’s selected foreign currency if there are any. If no prices are added in the deal’s selected foreign currency, the prices added in the main currency will be returned. These are then exchanged to the deal’s currency according to a valid exchange rate between the buy currency and the deal’s selected foreign currency, applying the Custom Profit / Markup if any, or the price level Profit / Markup.

If you have automatic products added to your environment, their sell price will be automatically exchanged for your deal’s currency in the Product booking step..
Adding a Customer and Travelers
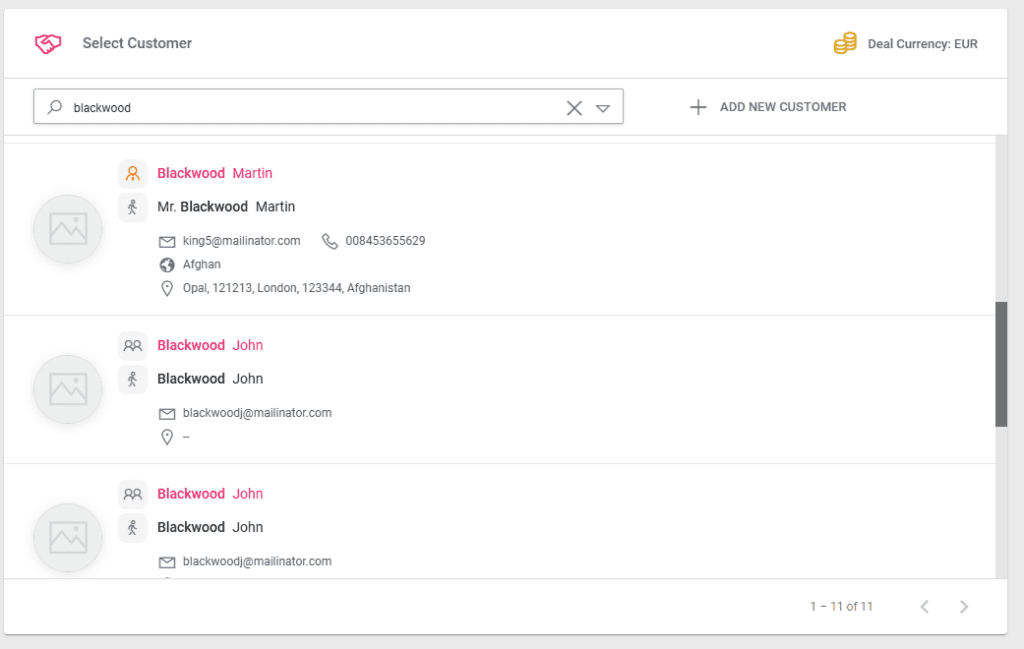
You will then be prompted to add a customer. At this point, you can add an existing customer or create a new one.
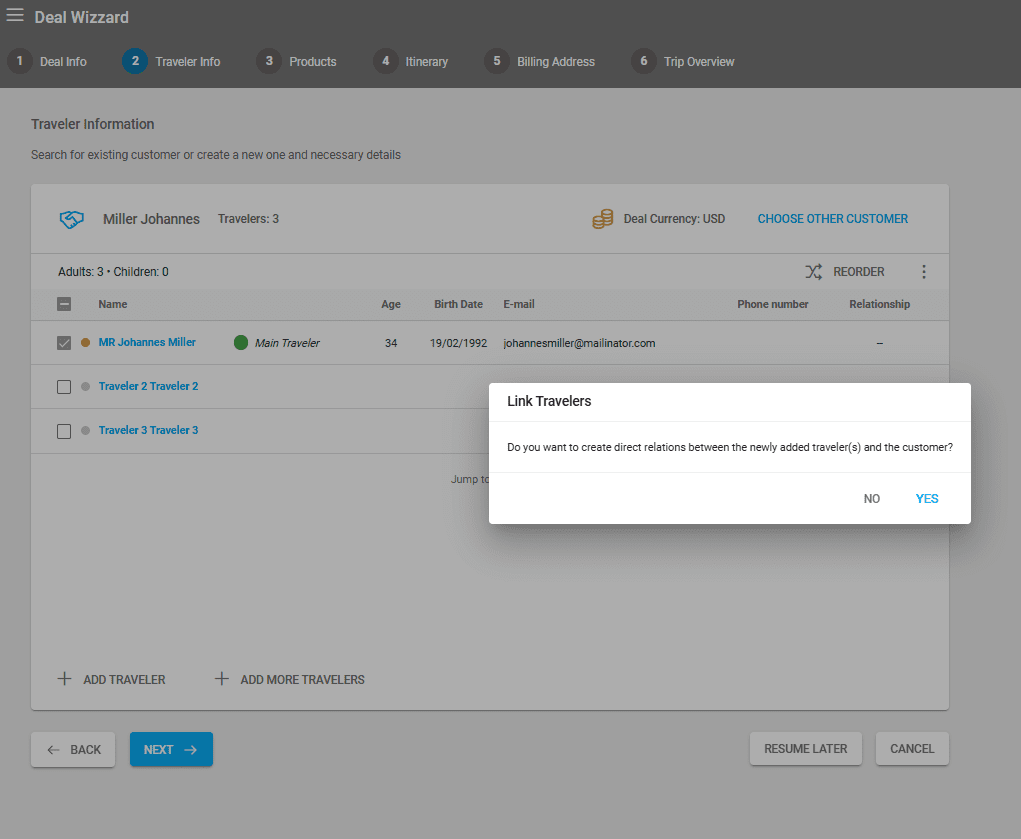
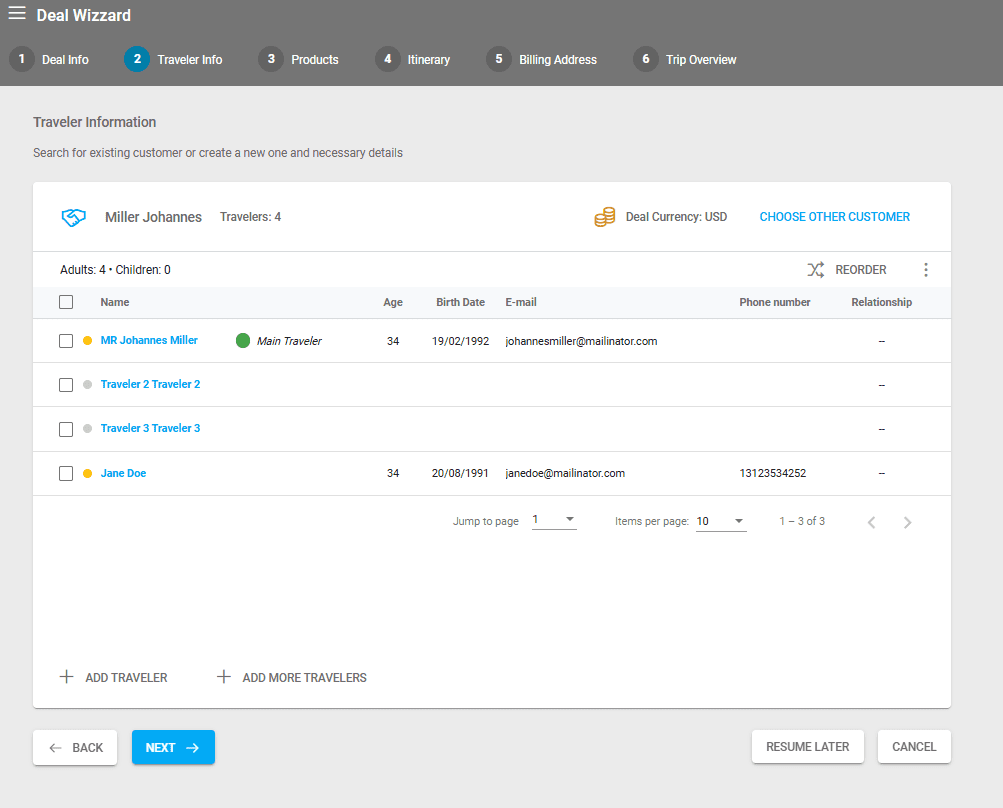
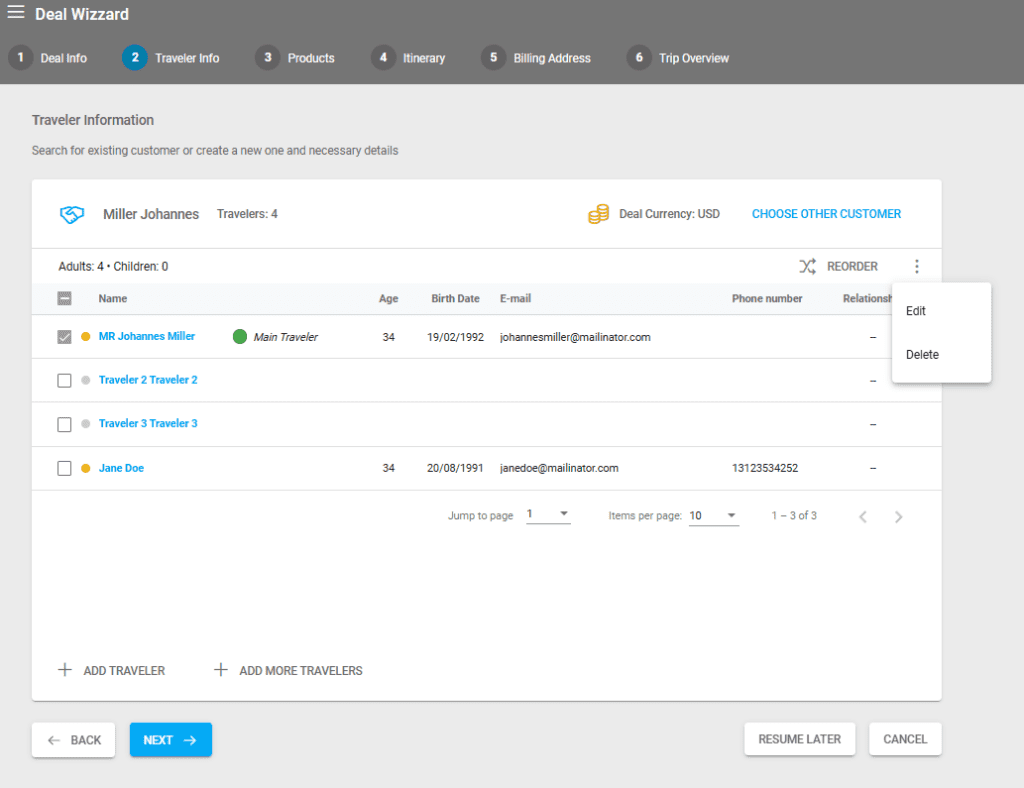
To add more travelers to the main customer, click on +ADD TRAVELER to insert all the information related to the traveler. To add multiple travelers without entering all their details immediately, click +ADD MORE TRAVELERS.
Next, choose whether to create a relationship between the newly added travelers and the main customer. If you establish such a relationship, these travelers will also be added to the customer’s personal list:
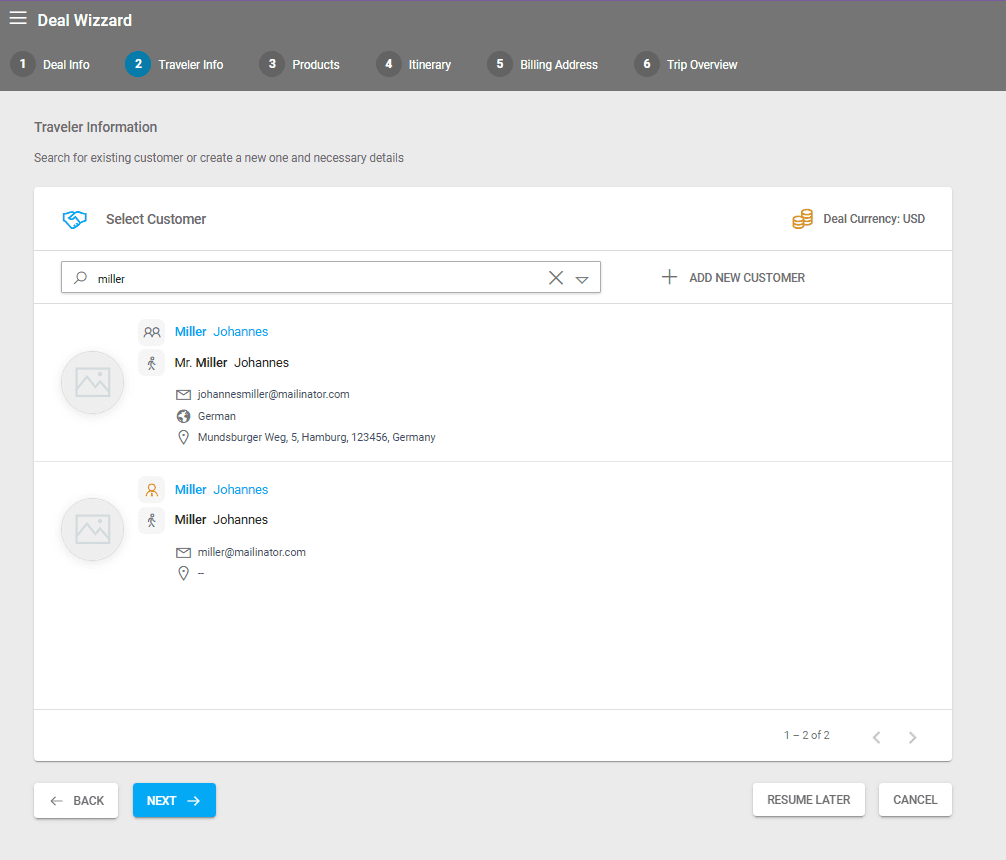
Enhanced Customer Search in Booking Process
The second step of the booking process has additional search options and icons related to the customer type. Pagination is displayed in the bottom right corner of the customer selection section along with the number of total search results.
To access the search options, click on the downwards arrow at the end of the customer search bar. Operators can search by
- Family Name/Company Name 1,
- Personal Name/Company Name 2
The new icons indicate whether the customer is also set as an agent (orange icon), or if they are a regular customer (icon with two persons).
Editing The Customer or Travelers
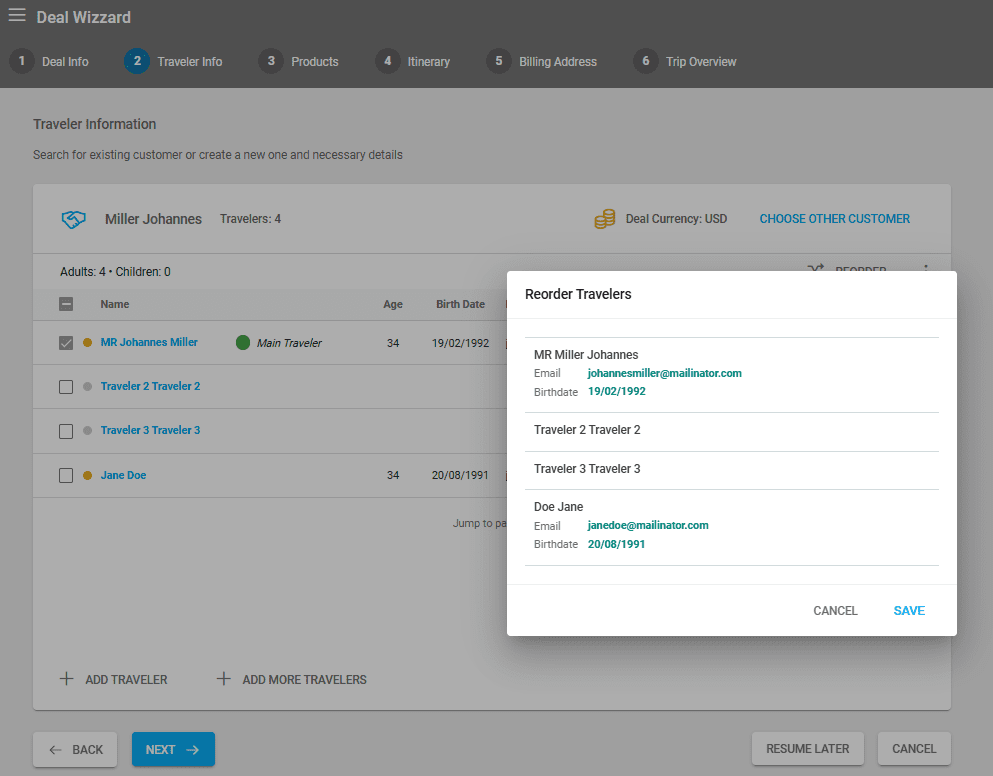
After adding travelers, you can reorder them using the REORDER option and edit their details using ACTIONS/EDIT.
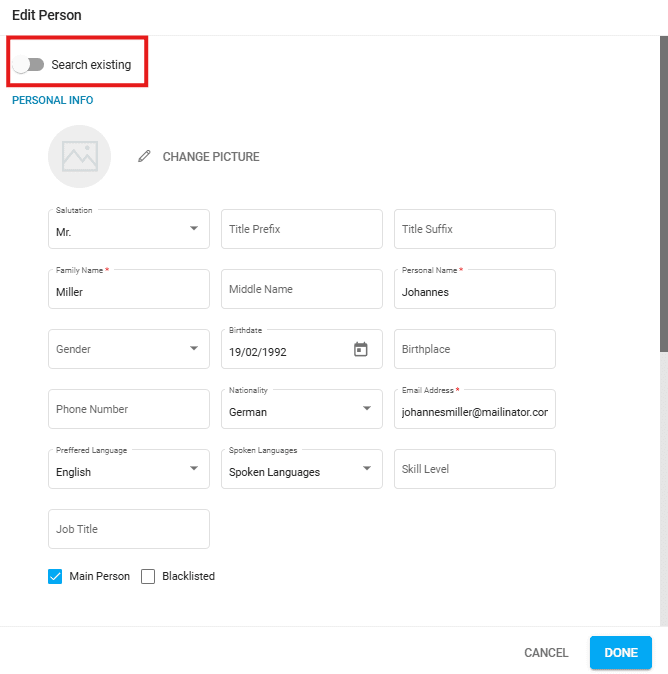
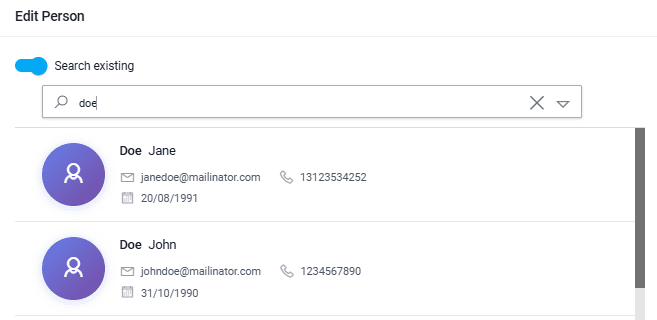
If you toggle the Search existing option, you can search for an existing person (customer) already created in your system or create a new person/traveler.
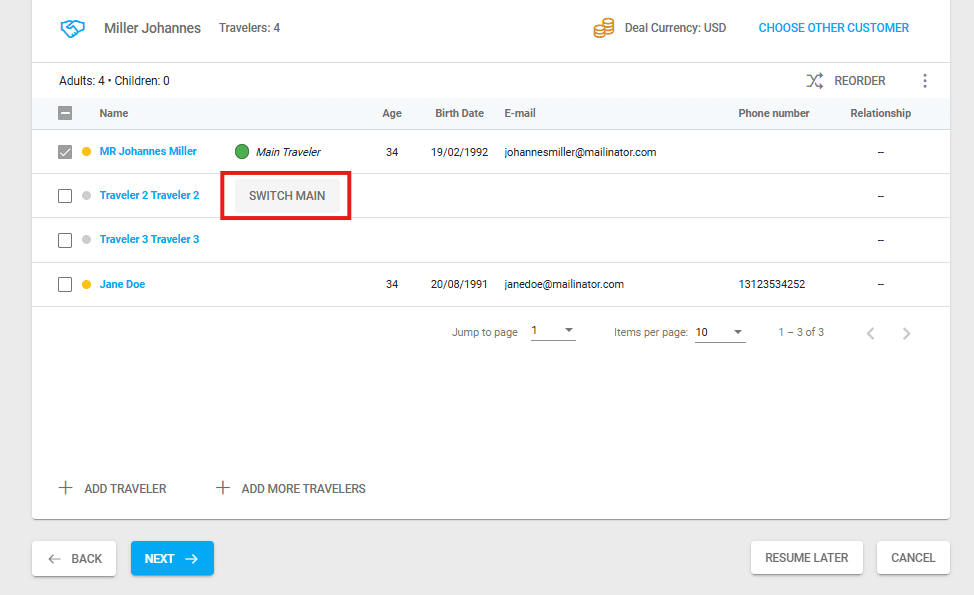
Switch Main Traveler
Hovering your mouse over the space between the traveler’s name and their age displays a button to switch the Main Traveler of the deal.
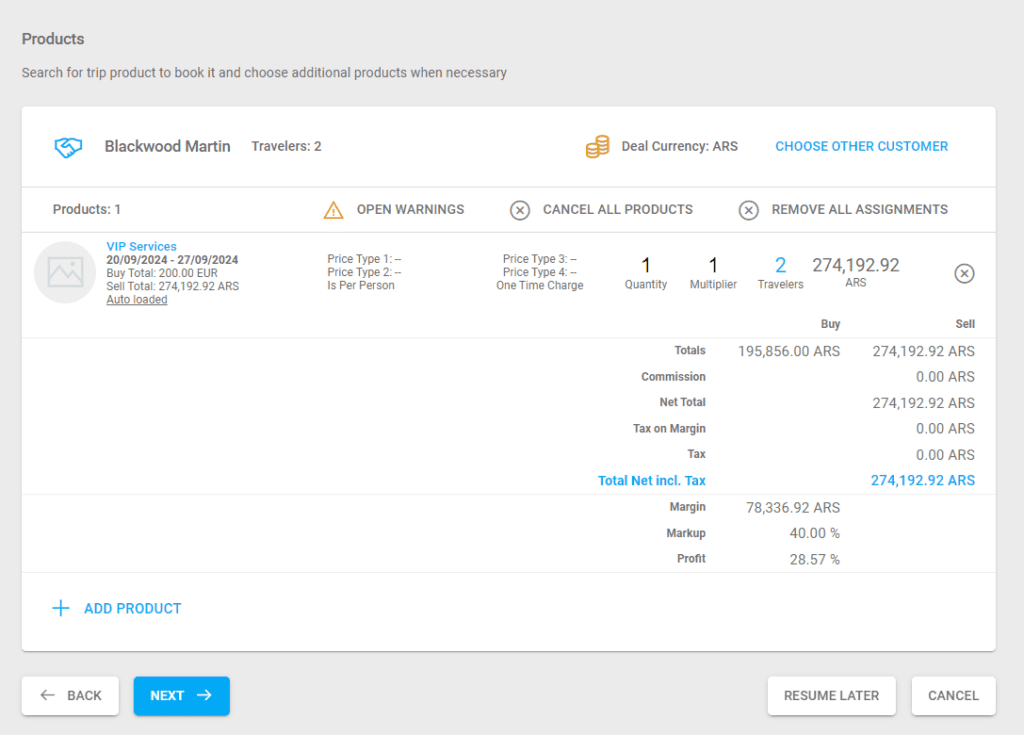
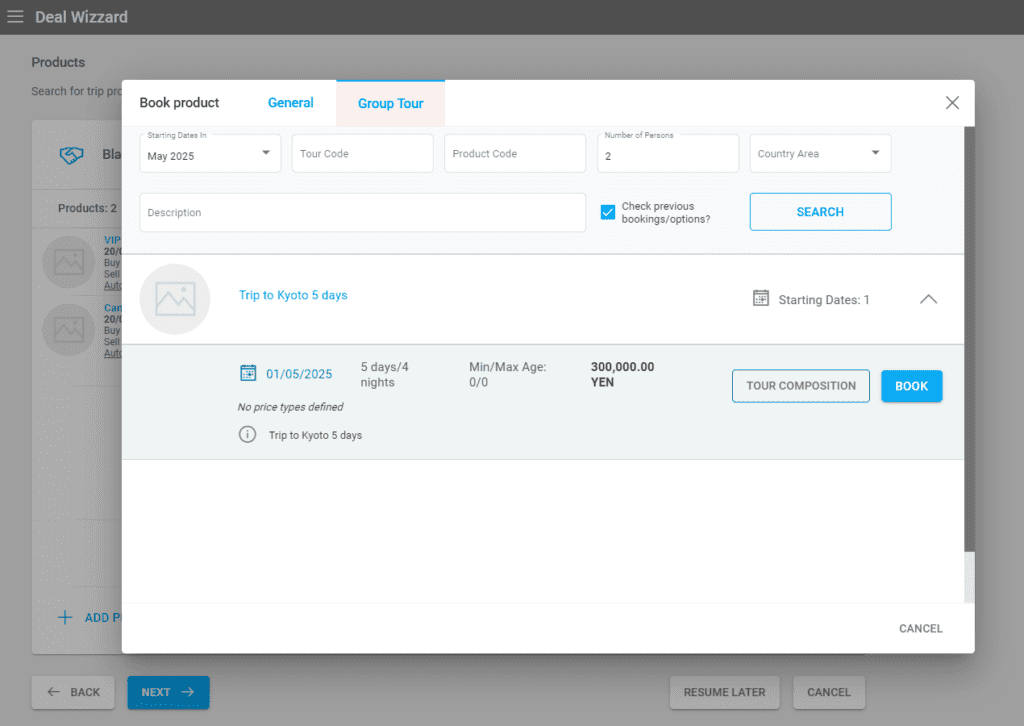
Adding Arrangements by Booking Products
Next, you must select the arrangements for your deal. Click on ADD PRODUCT and book your products. It is mandatory to search by the beginning and end date, but other fields are optional and can help you find your product more quickly.
There are two types of products that can be booked:
- General
- Group Tour type products
For booking group tour products, please consult the dedicated article here.
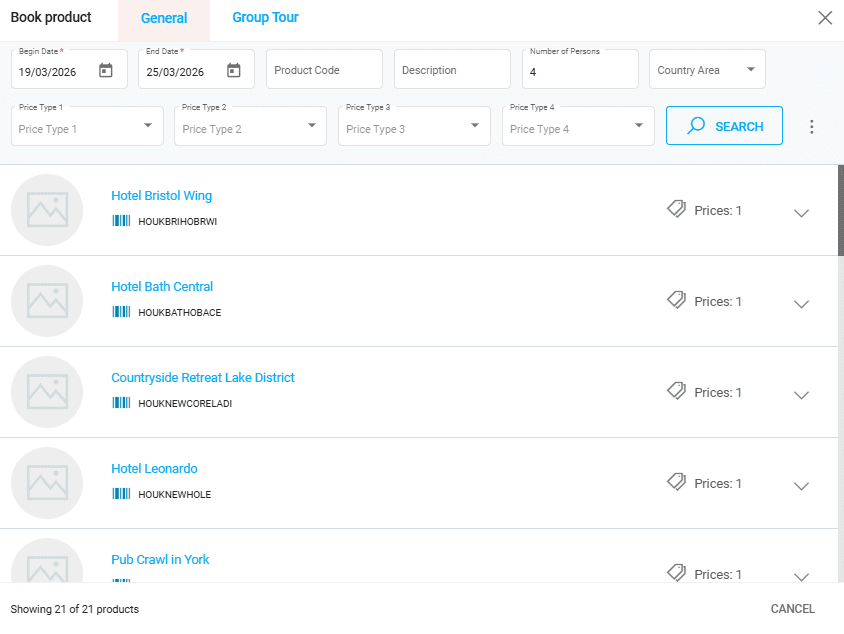
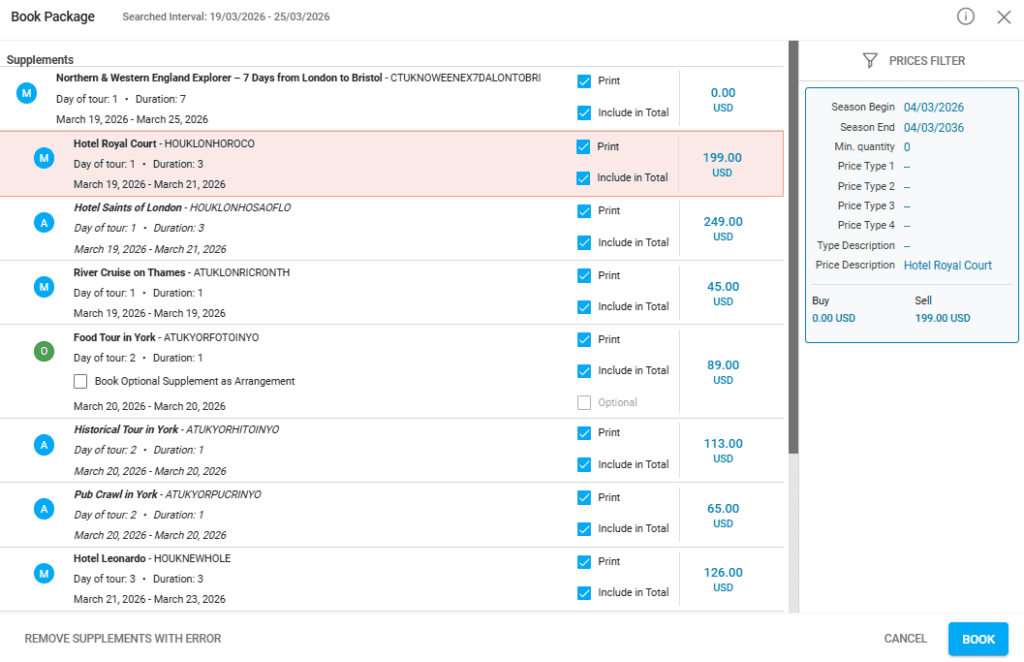
Select your product to book. If you have selected a package in your deal, the package supplements will be displayed. In this overlay, choose what is printed on the invoice (or other document templates) and what to include in the total amount of the deal – the final price.
If you check the Include in Total box, the price of the product will be added to the final price of the deal. If you check the Print box, the product will be displayed on different documents.
The system will import all the product details from the setup at the product level, but you can edit all the product’s details by clicking on the product name at this stage. These changes will only occur at the arrangement/deal level and will not affect the initial product setup.
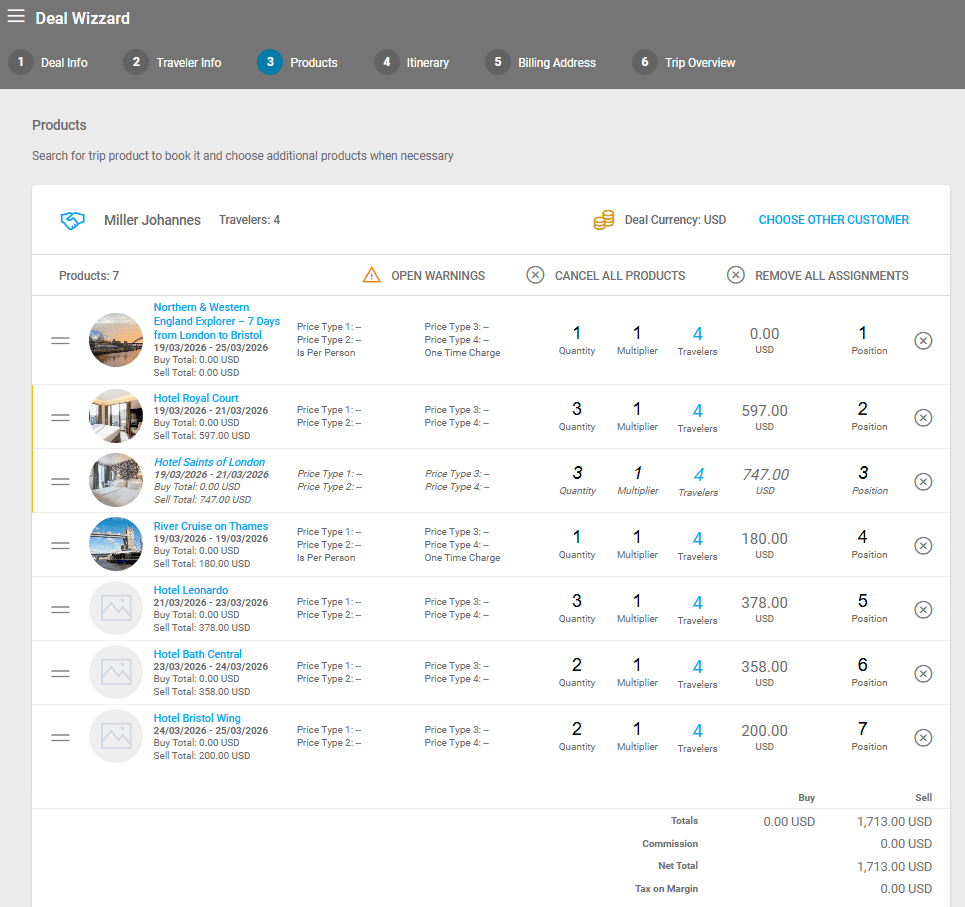
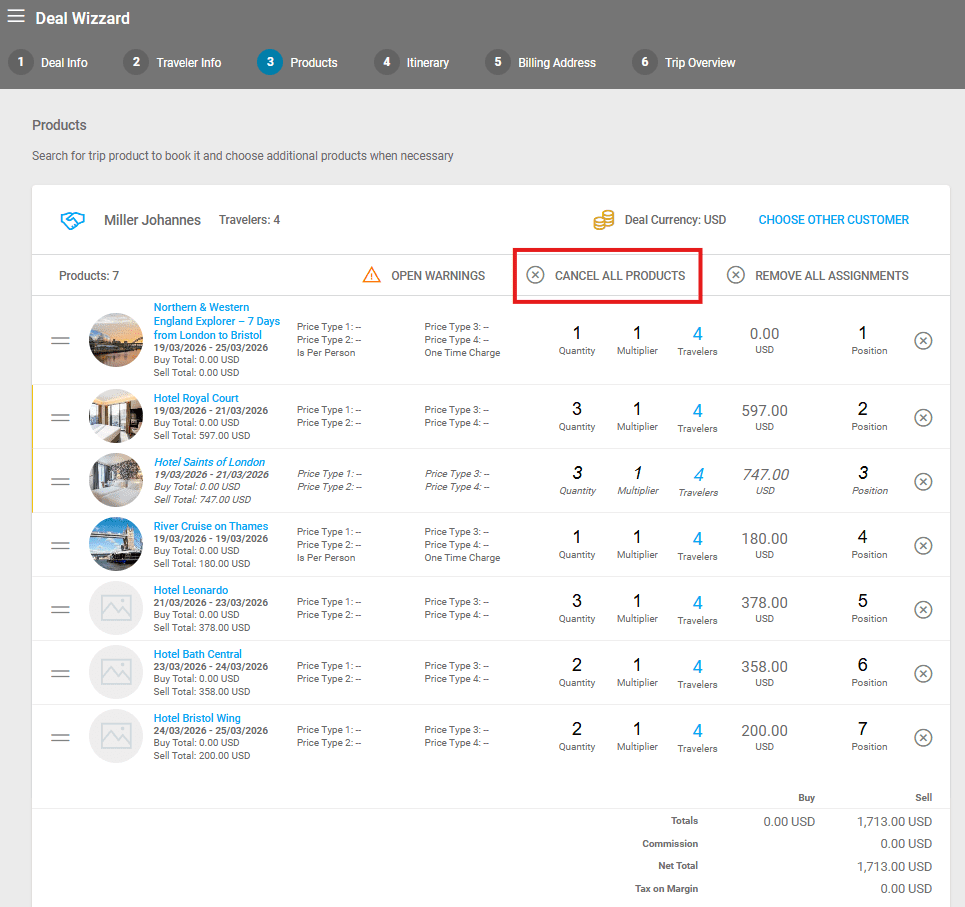
Removing Arrangements
Arrangements can be removed by clicking on the X button at the end of its respective row. The “Cancel All Products” button removes all the arrangements from the deal.
Booking Products in Foreign Currencies
If you want to book products in other currencies, you will need to add the corresponding currency exchange rates in your financial settings. The valid prices are returned by the system and exchanged where possible.
Sell Price Calculation
If your deal’s currency is a foreign one, then the system will follow the steps below to determine your arrangements’ prices:
- The deal sell currency is the same as the sell currency of the price that is to be booked: the system returns the sell price from the product’s price level.
- There is no valid price added in the deal’s sell currency, only in Home Currency and there is a Custom Profit/Markup applied: the system calculates the price according to a valid currency exchange rate added to your system and using the Custom Profit/Markup settings.
- There is no valid price added in the deal’s sell currency, only in Home Currency and there is NO Custom Profit/Markup applied: the system calculates the price according to a valid currency exchange rate added to your system and using the Price’s Profit/Markup settings.
Editing Arrangements And Their Currencies
When editing currency exchange rates in your arrangement settings, you will have limited choices depending on how your currencies are set up:
- Buy Exchange Rate HC – editable ONLY if the buy currency is not same as the home currency
- Buy Exchange Rate SC – editable ONLY if the buy currency is not same as the sell currency
- Sell Exchange Rate HC – editable ONLY if the sell currency is not same as the home currency
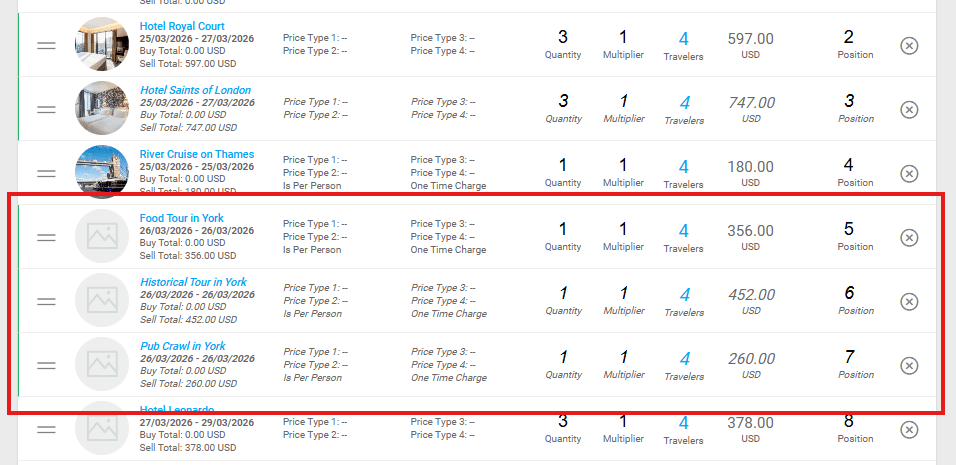
Alternative Arrangements in Package Products
When booking a package, some supplements may be set as optional or alternatives. If these are selected in the package product booking overlay, then they will be displayed with a connecting colour on the left side of the rows, and with italic text.
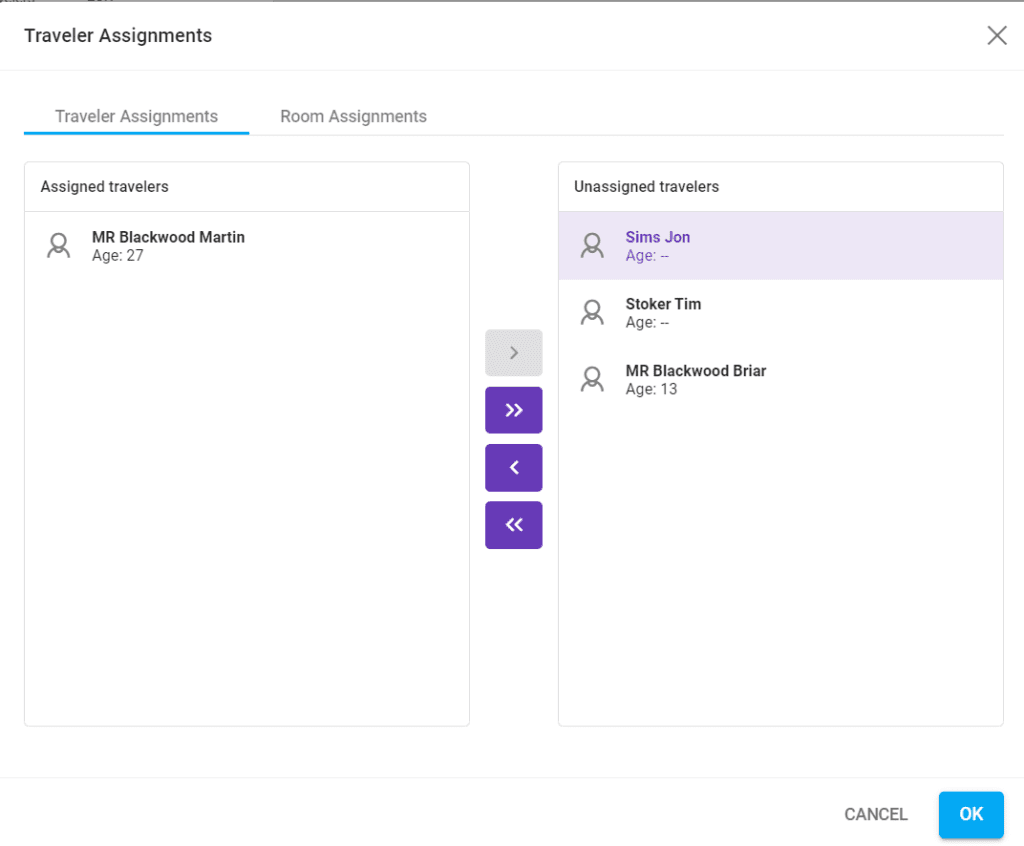
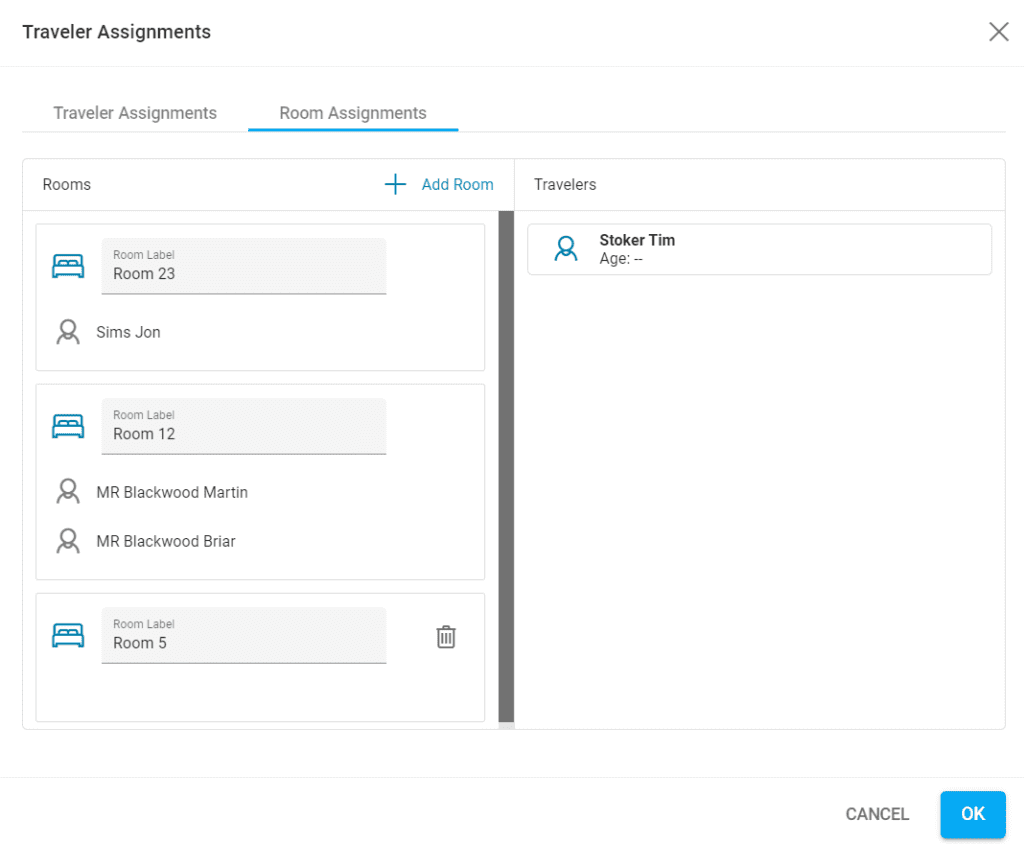
Room Assignment
Booking a product with rooms opens a window for the traveler and room assignment. First, the travelers need to be selected in the “Traveler Assignment” tab to assign them to rooms. In the “Room Assignments” tab, new rooms can be added and the travelers can be moved to them by drag and drop. The room name can be edited freely.
Room Assignments can be modified in the Deal Details after saving the Deal by clicking on the PAX number in the Arrangements tab. Assigned Arrangements can be viewed in the Travelers section of the Deal Details by clicking on the “Show All Assignments” button.
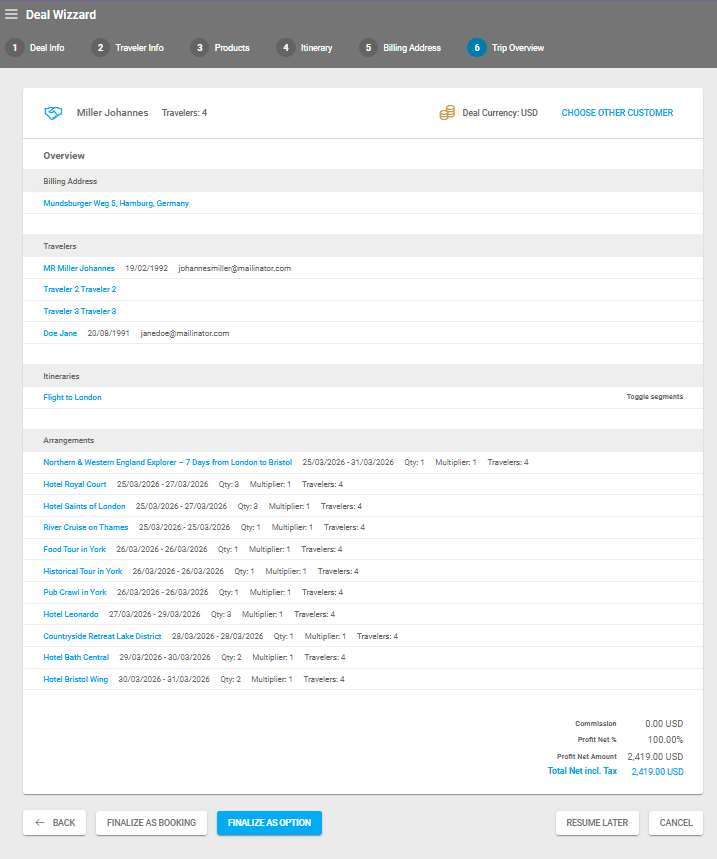
Adding an Itinerary and Addresses, and Finalizing The Deal
Next, you find the option to add an itinerary and segments, if necessary, and after that, you can add or remove addresses. The next step is to finalize the deal after ensuring all details are correct. If not, make the necessary corrections and then finalize the deal.
Two buttons are available at the bottom to set the deal to Booking or Option.
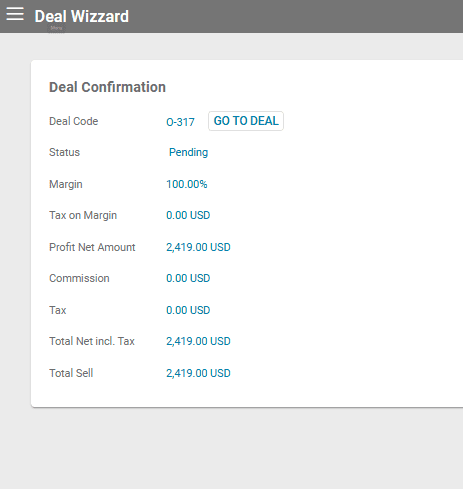
Voilà!
You now have the deal confirmation.
How to Add an Itinerary Type Deal
The Itinerary Deal is designed for booking trips, which will be linked to the newly created deals.
The deal process is the same as described above for the Standard Deal, with the difference being that for an Itinerary Deal, a trip is saved and attached to the deal. For all Itinerary type deals in the Deals List, the icon of the trip is visible.

If you click on the trip icon, the trip associated with the deal will open, and you can personalize it for each client without changing the main trip product that was created in the trip list.
How to Add a Lead Type Deal
To add a Lead deal, click on the last option in the Create Deal process. For adding a Lead in the Pipeline, please check the Pipeline article.
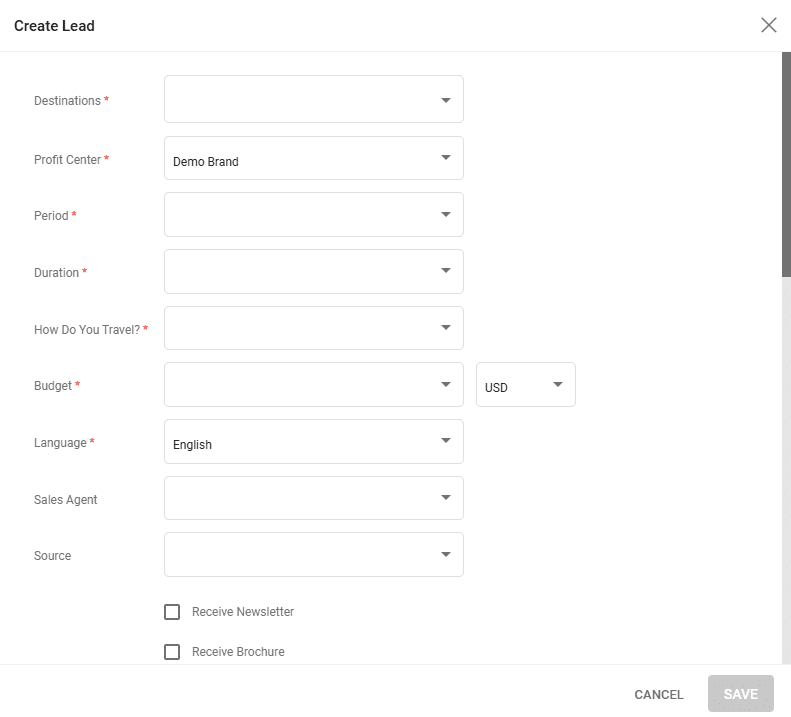
The lead creation window has fields for the following:
- Destinations – the deal’s preferred destinations. Can choose multiple.
- Profit Center – the brand the deal is created under.
- Period – a drop down list with months for the estimated travel period.
- Duration – a drop down list with period ranges such as 1 week, 2 weeks and so on.
- How Do You Travel? – a dropdown list with several options for the travelers (traveling with their family, friends, etc.)
- Budget – a drop down list with budget ranges. The field next to this one has a drop down list for the currency.
- Language – the preferred language of the travelers and the language the deal will be in.
- Sales Agent – drop down list with the system’s users.
- Source – drop down list with possible lead sources such as a newsletter, agency, etc.
- Checkboxes for newsletter and brochure preferences
- Checkboxes for notifying the customer and the operator
After filling out the general lead details, a Customer can be selected.
If you search by Existing, you can use the search box to look up already existing customers. Advanced search filters are available at the end of the search box for filtering customers.
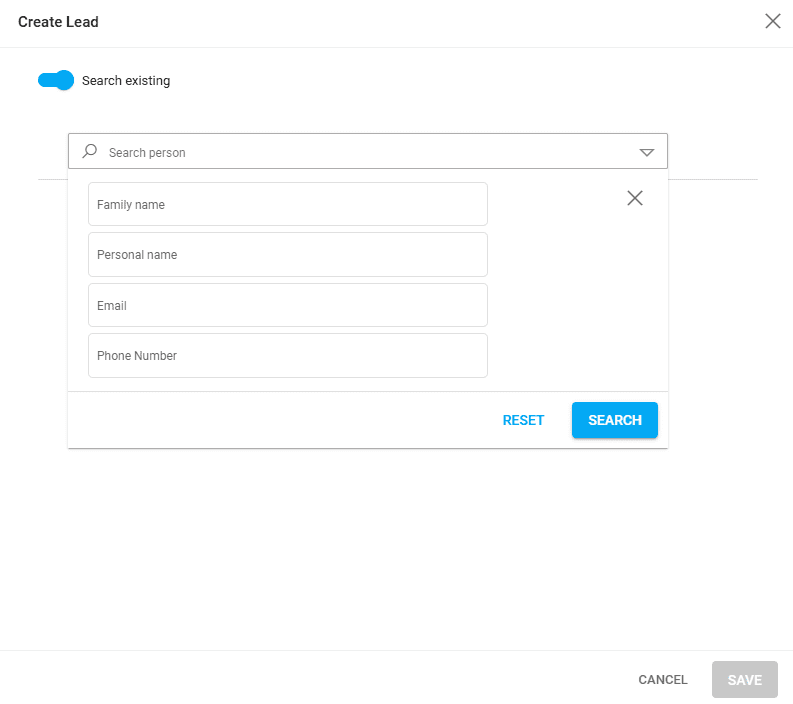
If you input data in the Customer fields, a new customer entry will be created upon saving the Lead deal. The customer fields are as follows:
- Salutation
- First Name
- Last Name
- Email – if you use an email that already exists in the system, a note appears under the field that recommends searching by existing customers.
- Personal details such as phone number and address details
- Referer – a drop down list with referral options that can be modified in Settings / Choice Lists / Referer
- Note and Travel Description – for any relevant notes on the lead deal. These are only available internally and are saved as a Note on the deal level, with the Note field being saved as the Subject of the note, and the Travel Description field being saved as the Body of the note.
A new lead deal is created along with a customer, address and person entry upon clicking the save button.


Lead to Option to Booking Process
A deal can have three stages:
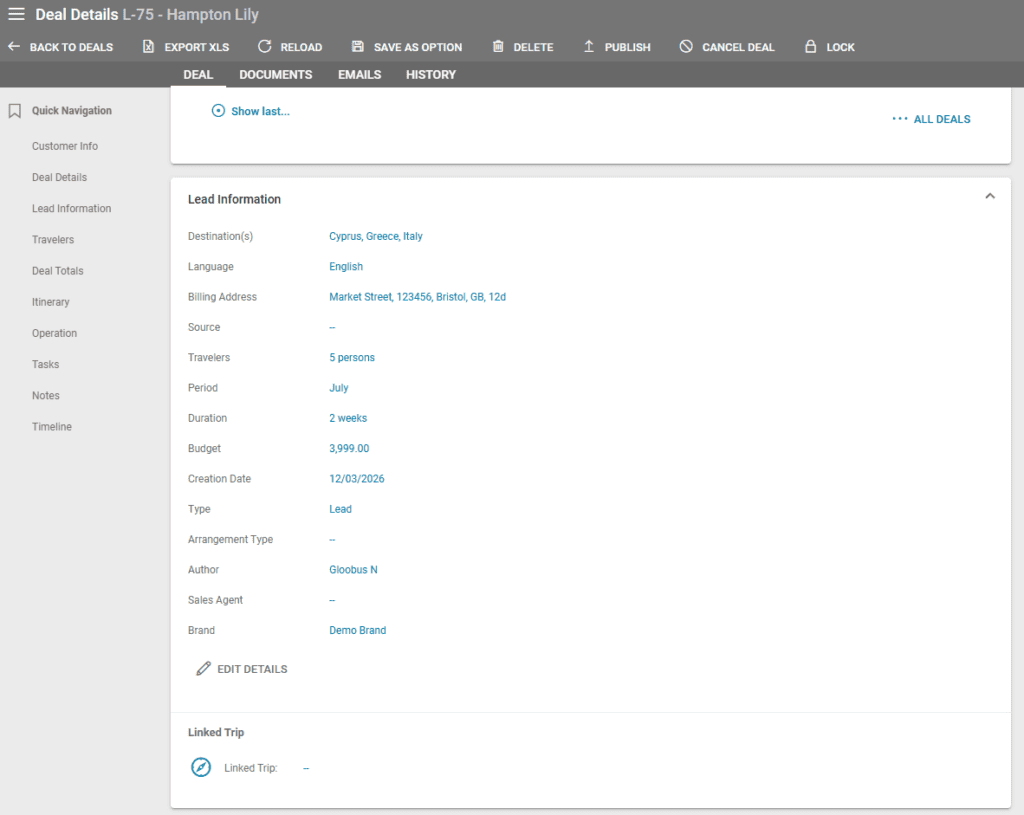
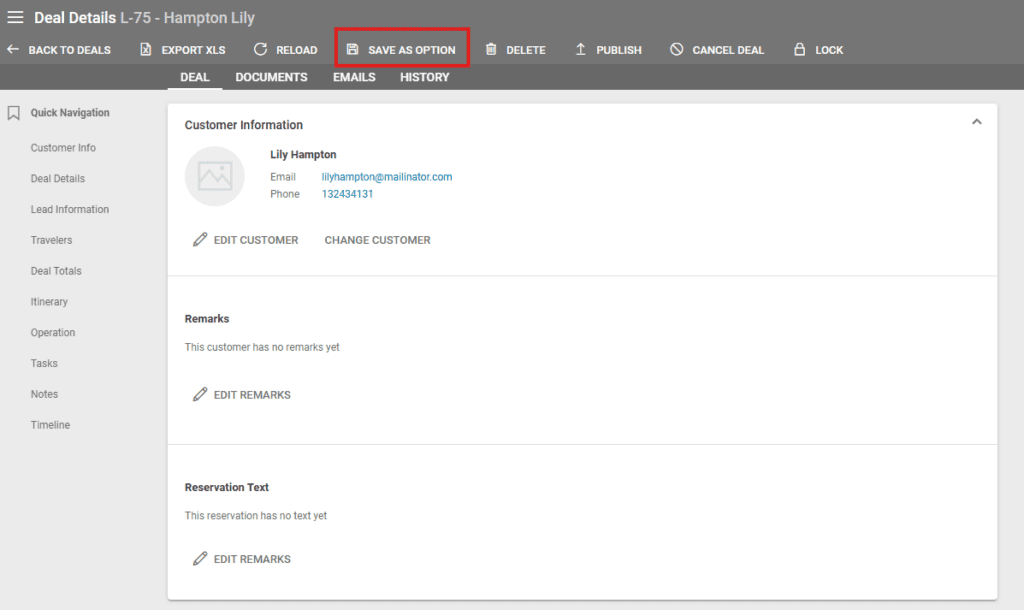
- Lead – a simple deal with the bare minimum information needed to build an itinerary. This type of deal doesn’t have an Arrangement tab, so products can’t be booked yet. To transform a lead deal to an option, select an Arrangement Type in the Lead Information section, then click the “Save as option” button.
- Option – the deal not has an Arrangements tab where operators can book products. The Deal Information section now has more fields.
- Booking – the final stage of a deal that represents the deal as confirmed. At this stage, operators can generate customer invoices.
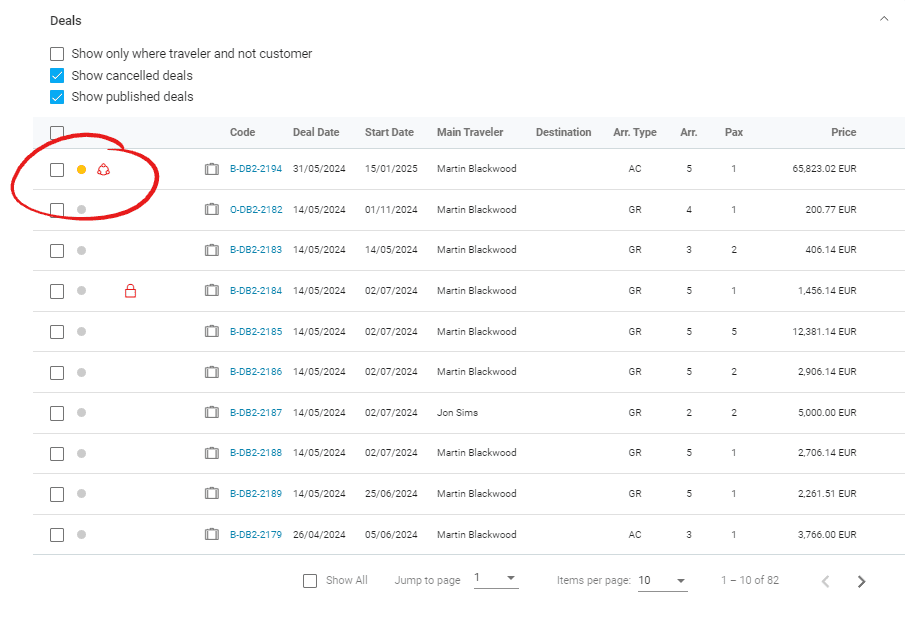
Deal Publishing to Client Space
The Client Space is an additional module enabled on demand for tenants to share deals with their customers. This is a customer-facing platform on which deals can be published from Victoury. If you’d like to find out more about the Client Space, please contact our support team or your Victoury representative.
Deals that have been published to the Client Space have an icon next to their code. This can be seen in the respective Customer Details under the “Deals” section.